Managing your financial records in QuickBooks includes understanding how to correct entries such as deposits. Whether you’ve entered a deposit incorrectly or need to update your records, deleting a deposit in QuickBooks is a process you should handle with care to ensure your accounts remain accurate. This guide will walk you through the steps to delete a deposit in QuickBooks, whether you’re using the desktop or online version.
Understanding QuickBooks and the Importance of Managing Deposits
QuickBooks is a comprehensive accounting software used by businesses to manage income, expenses, assets, and liabilities. Properly managing deposits is crucial as these transactions affect your financial statements and tax reporting.
Steps to Delete a Deposit in QuickBooks Desktop
Here’s how to delete or void a deposit in QuickBooks Desktop:
Step 1: Open QuickBooks Desktop
Start by opening your QuickBooks Desktop software and logging into your company file with the appropriate credentials.
Step 2: Access the Record Deposit Window
- Navigate to the “Banking” menu at the top of the screen.
- Select “Make Deposits” if you immediately see the deposit in question in the payments window that opens. If you don’t see it, proceed to the next step.
- Click “Cancel” to go to the main “Make Deposits” window.
Step 3: Locate the Deposit
- If you are not already in the “Make Deposits” view, click on “Record Deposits” in the “Banking” menu to see the deposit records.
- Go to the “Previous” button to browse through your deposits if the one you want to delete isn’t immediately visible.
Step 4: Delete or Void the Deposit
- Once you have located the deposit you wish to delete, review it to ensure that it is indeed the transaction you need to remove.
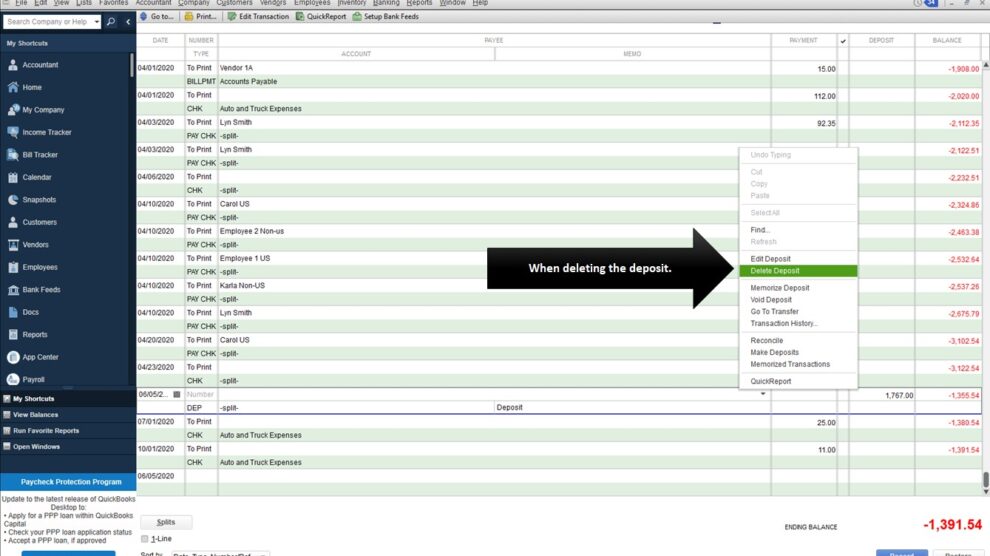
- With the deposit open, go to the “Edit” menu at the top of the screen.
- Select “Delete Deposit” to remove the deposit completely. Alternatively, you can choose “Void Deposit” to keep a record of the deposit with a zero amount.
Step 5: Confirm the Deletion
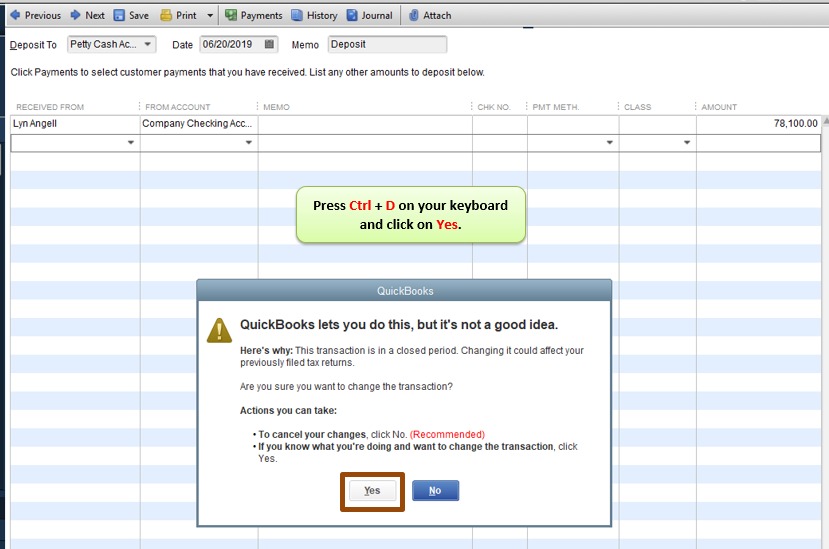
QuickBooks will ask for confirmation before permanently deleting the deposit. Confirm that you want to delete it to proceed.

Steps to Delete a Deposit in QuickBooks Online
Step 1: Log Into QuickBooks Online
Access your account by logging into QuickBooks Online.
Step 2: Find the Deposit
- Click on the “Plus” icon (+) at the top of the dashboard.
- Choose “Bank Deposit” under the “Other” column to open the “Bank Deposit” window where you can view past deposits.
Step 3: Locate the Deposit to Delete
- In the “Bank Deposit” screen, use the “Find” tool or browse through your list of deposits to find the one you need to delete.
Step 4: Delete or Void the Deposit
- Click on the deposit to open it.
- At the bottom of the deposit screen, you’ll see options to “Edit,” “Void,” or “Delete” the deposit.
- Choose “Delete” to remove the deposit from your records or “Void” to zero out the deposit but keep a record of it.
Step 5: Confirm the Deletion
Confirm your choice when prompted to ensure the deposit is permanently deleted.
Key Considerations When Deleting a Deposit
- Impact on Financial Reports: Deleting a deposit will affect your financial statements and potentially your tax filings.
- Reconciliation: Ensure that deleting a deposit doesn’t interfere with reconciled transactions unless you’re correcting a reconciled mistake.
- Backup: Consider backing up your data before deleting significant transactions in case you need to restore your original data.
Conclusion
Deleting a deposit in QuickBooks should be done with careful consideration of the implications on your financial reporting. Whether using QuickBooks Desktop or Online, the process involves a few clear steps to ensure your books stay accurate and up-to-date. Always double-check the details of the deposit before proceeding with deletion to avoid potential discrepancies in your accounting records.


Add Comment