Creating a new user account in Windows 7 is a simple process that allows you to set up separate profiles for different users on the same computer. Each user account can have its own settings, preferences, and files, ensuring privacy and personalization. In this guide, we will walk you through the steps to create a new user account in Windows 7.

Step 1: Open the Control Panel
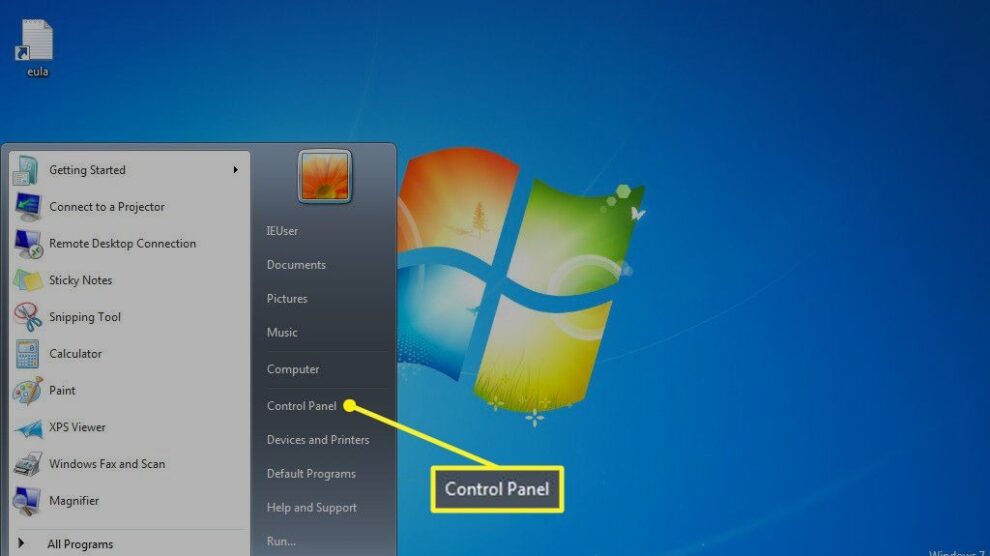
To begin, click on the Start button in the bottom-left corner of your screen. From the Start menu, select “Control Panel.” Alternatively, you can type “Control Panel” in the search box and press Enter.
Step 2: Navigate to User Accounts
In the Control Panel, look for the “User Accounts and Family Safety” section. Click on “User Accounts” to proceed.
Step 3: Choose “Manage Another Account.”
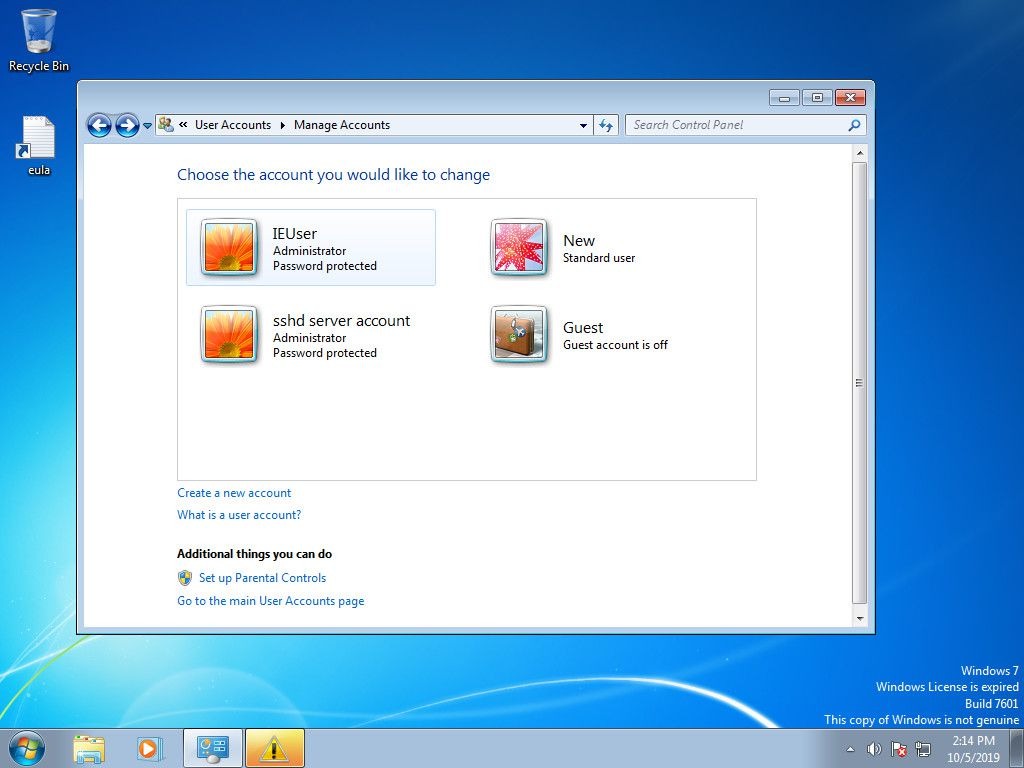
On the User Accounts page, click on the “Manage Another Account” option. This will take you to the Manage Accounts page, where you can create, modify, or delete user accounts.
Step 4: Select “Create a New Account.”
On the Manage Accounts page, click on the “Create a New Account” option. This will open a new window where you can enter the details for the new user account.
Step 5: Enter the Account Name and Type
In the “Create New Account” window, enter a name for the new user account in the provided text box. This name will be used to identify the account on the login screen and in the system.
Next, choose the account type. There are two options:
- Standard User: This type of account is suitable for most users. It allows the user to run programs, personalize their settings, and access their own files. However, a Standard User cannot install software or make changes that affect other users or the system.
- Administrator: An Administrator account has full control over the computer. It can install software, change system settings, and manage other user accounts. It is recommended to have at least one Administrator account on the computer.
Select the appropriate account type based on the user’s needs and access requirements.
Step 6: Create the Account
After entering the account name and selecting the account type, click on the “Create Account” button. Windows 7 will create the new user account and display it on the Manage Accounts page.
Step 7: Set Up a Password (Optional)
By default, the newly created account does not have a password. However, it is recommended to set a password for security purposes. To set a password, click on the new account on the Manage Accounts page and select “Create a Password.”
Enter a strong password in the provided text boxes and click “Create Password” to set it. Make sure to choose a password that is easy for the user to remember but difficult for others to guess.
Step 8: Log In to the New Account
To log in to the newly created account, click on the Start button and select the “Log Off” or “Switch User” option. On the login screen, click on the new user account and enter the password (if set) to log in.
Congratulations! You have successfully created a new user account in Windows 7. The user can now personalize their settings, access their files, and use the computer with their own profile.
Additional Tips
- Create separate user accounts for each person using the computer to maintain privacy and organize files.
- Assign appropriate account types based on the user’s needs and technical knowledge.
- Encourage users to set strong passwords and keep them confidential.
- Regularly review and manage user accounts to ensure system security and remove unused accounts.
By following these steps and tips, you can easily create and manage user accounts in Windows 7, providing a personalized and secure computing experience for each user on your computer.


Add Comment