As a business owner or accounting professional using QuickBooks Online, there may be times when you need to delete a journal entry. Whether it’s due to an error, a duplicate entry, or a change in your financial records, the ability to delete journal entries is an important skill in maintaining the accuracy and integrity of your QuickBooks data. In this comprehensive guide, we’ll walk you through the process of deleting journal entries in QuickBooks Online, ensuring you have the knowledge and confidence to manage your financial records effectively.
Understanding the Importance of Deleting Journal Entries
Deleting journal entries in QuickBooks Online can serve several crucial purposes:
- Correcting Errors: If you’ve made a mistake in recording a journal entry, deleting it and re-entering the correct information can help maintain the accuracy of your financial records.
- Removing Duplicate Entries: In some cases, you may accidentally create a duplicate journal entry. Deleting the duplicate entry can prevent confusion and inaccuracies in your financial reporting.
- Aligning with Accounting Standards: Periodically reviewing and deleting obsolete or irrelevant journal entries can help ensure your QuickBooks data remains compliant with relevant accounting standards and best practices.

How to Delete a Journal Entry in QuickBooks Online
Follow these steps to delete a journal entry in QuickBooks Online:
Step 1: Locate the Journal Entry
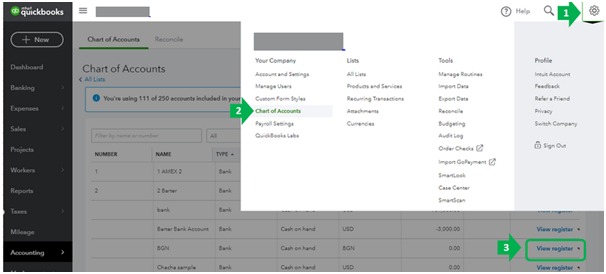
- Log in to your QuickBooks Online account and navigate to the “Journal” section.
- Locate the specific journal entry you want to delete by reviewing the list of entries or using the search functionality.
Step 2: Delete the Journal Entry
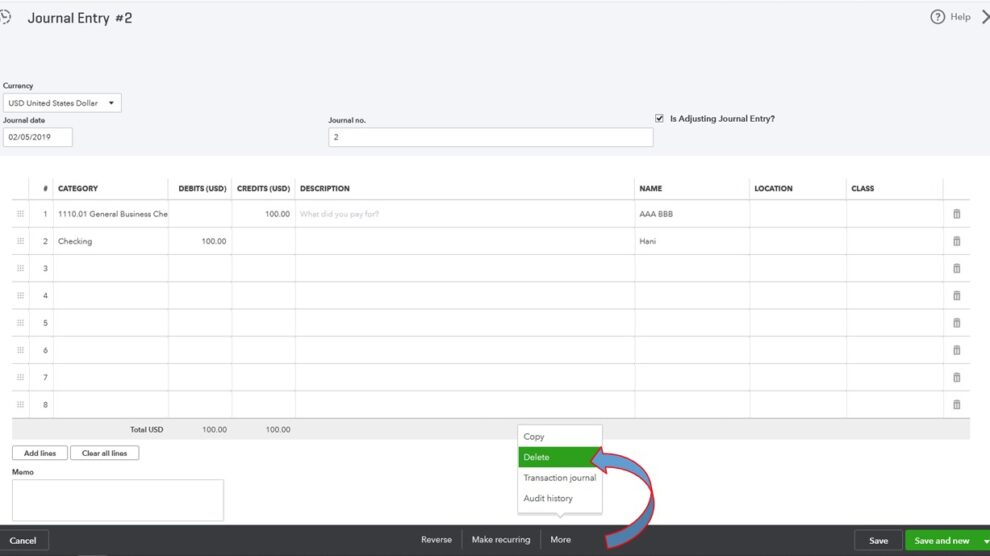
- Click on the journal entry you want to delete to open it.
- In the journal entry view, look for the “Delete” option, typically located in the top-right corner of the screen.
- Click the “Delete” button to initiate the deletion process.
Step 3: Confirm the Deletion
- In the confirmation prompt, review the details of the journal entry you’re about to delete.
- If you’re sure you want to proceed, click the “Delete” button to permanently remove the journal entry from your QuickBooks Online records.
Considerations and Best Practices
When deleting journal entries in QuickBooks Online, keep the following in mind:
- Ensure you have the necessary permissions and access levels to delete journal entries within your QuickBooks Online account.
- Before deleting, consider whether the journal entry could be corrected or reversed instead of being permanently deleted.
- Document the reason for the deletion, especially if the journal entry was part of a completed financial reporting period or had associated transactions.
- Review your financial reports and statements to ensure the deletion does not impact your overall financial records.
Conclusion: Mastering QuickBooks Online’s Journal Entry Management
Deleting journal entries in QuickBooks Online is a valuable skill that can help you maintain the accuracy and integrity of your financial records. By following the steps outlined in this guide, you can confidently remove unnecessary or erroneous journal entries, ensuring your QuickBooks Online data remains a reliable and up-to-date representation of your business’s financial standing.
Remember, effective journal entry management is an integral part of your overall QuickBooks Online accounting practices. Embrace the power of deleting journal entries as part of your financial management strategy, and continue to optimize your QuickBooks Online environment for maximum efficiency and success.


Add Comment