Streamlining your QuickBooks Online account by deleting multiple transactions can be essential for maintaining accurate records, especially if you’ve entered data erroneously or need to perform bulk updates. This guide will help you understand how to delete multiple transactions efficiently in QuickBooks Online.
What is QuickBooks Online and Why Delete Multiple Transactions?
QuickBooks Online is a cloud-based accounting software that helps businesses manage their financial activities such as tracking income, expenses, and maintaining comprehensive financial records. Deleting multiple transactions might be necessary in cases of duplicate entries, data entry errors, or when starting anew with your accounting data.
Steps to Delete Multiple Transactions in QuickBooks Online
QuickBooks Online offers a straightforward process to delete or void multiple transactions through its Batch Actions feature. Here’s how you can use this feature:
Step 1: Log Into Your QuickBooks Online Account
Begin by accessing your QuickBooks Online account. Enter your login details on the official QuickBooks Online website to start.
Step 2: Navigate to the Banking or Expenses Menu
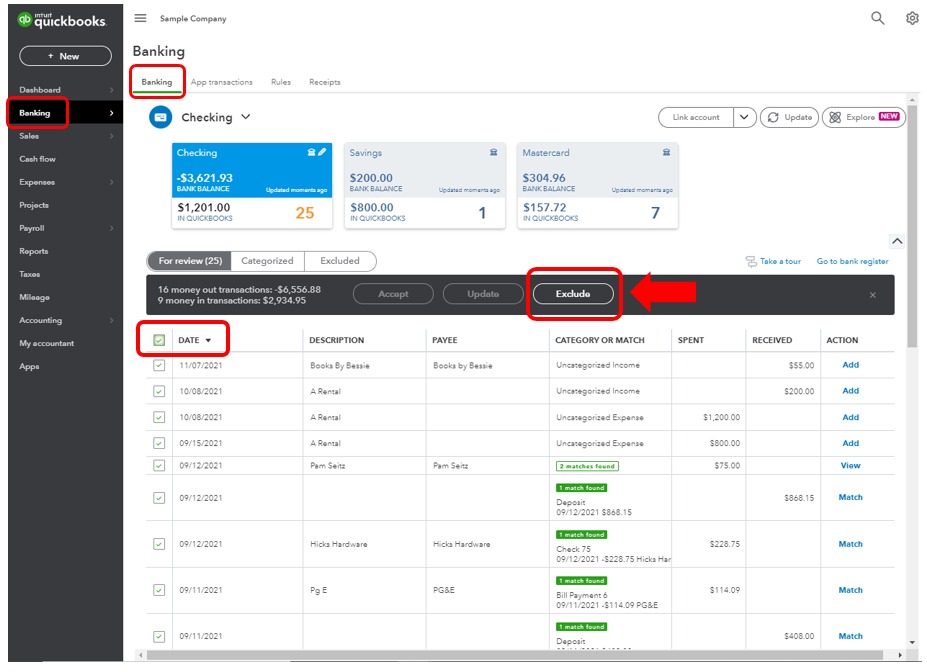
- For Bank Transactions: Click on “Banking” from the left-hand menu. This area shows all bank and credit card transactions.
- For Non-Bank Transactions: Click on “Expenses” or “Sales” (depending on whether you want to delete expenses or sales transactions) in the left-hand menu.
Step 3: Select the Transactions to Delete
- Choose the Account: In the Banking section, select the bank or credit card account from which you want to delete transactions.
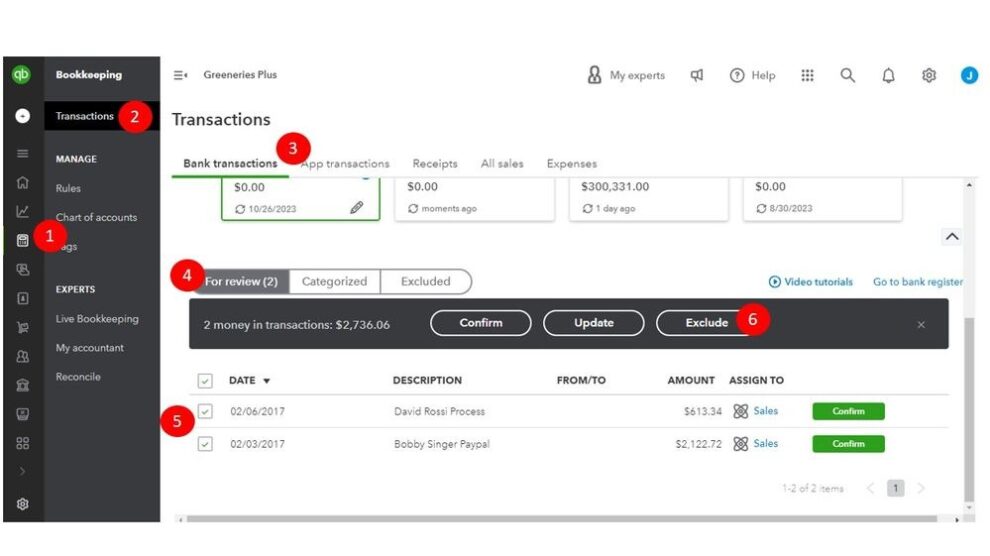
- Filter and Select Transactions: Use filters to display transactions by date or type if necessary. Check the boxes next to each transaction you wish to delete.
Step 4: Use Batch Actions to Delete
- Batch Actions: Above the list of transactions, you’ll find the “Batch actions” button. Click on it.
- Select ‘Delete’ or ‘Exclude’: From the dropdown menu, choose “Delete” if you want to permanently remove transactions from QuickBooks. Alternatively, you can select “Exclude” to remove transactions from the “For Review” list but keep them in the system for possible later review.
Step 5: Confirm the Deletion
QuickBooks will prompt you to confirm the deletion of selected transactions. Confirm your choice to proceed with deleting them. This action cannot be undone, so ensure that you truly intend to delete these records.

Considerations Before Deleting Multiple Transactions
- Backup Your Data: Always consider backing up your data before performing bulk deletions. This ensures that you can restore your original data if the deletion does not go as planned.
- Review Transactions: Double-check the transactions you are about to delete. Ensure that deleting them won’t affect your financial reporting or compliance.
- Impact on Financial Statements: Be aware that deleting transactions will affect your financial statements and may require adjustments in your reports.
FAQs About Managing Transactions in QuickBooks Online
Can I recover deleted transactions?
Once transactions are deleted, they cannot be recovered within QuickBooks Online. You would need to manually re-enter any transaction that was deleted by mistake.
How can I delete transactions in bulk from different accounts?
You need to select transactions within each account separately. QuickBooks Online does not currently support cross-account bulk deletion in a single action.
Is there a way to undo a bulk deletion?
No, there is no direct way to undo a bulk deletion once confirmed. You would need to restore from a backup or re-enter the transactions manually.
Conclusion
Deleting multiple transactions in QuickBooks Online can help correct errors and maintain accurate financial records. By following these steps, you can efficiently manage bulk deletions, ensuring your accounts reflect the correct financial data. Always take care to review and backup data before performing deletions to avoid unintentional loss of important information.


Add Comment