As remote work explodes, managing input connections across multiple devices turns ever more frustrating. Cables tangle everywhere routing keyboards and mice between work laptops, personal machines, streaming boxes and more.
Consumer switches exist to ease multi-device input switching, but compatibility issues abound while performance degrades over time. So why not build your own superior switch maximizing speed and seamless control?
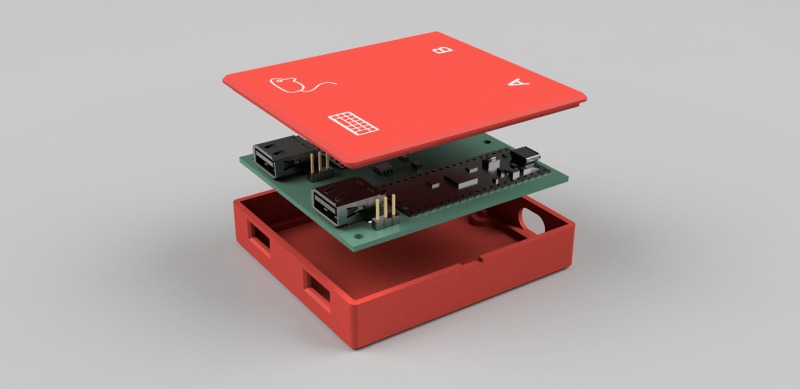
That’s the appeal behind the new DIY gadget sensation DeskHop – an open-source keyboard/mouse sharing switch leveraging Raspberry Pi Pico microcontrollers. We’ll break down what makes DeskHop special plus guide you assembling your own enhanced input switch improving any desktop.
DeskHop Build Benefits
On the surface DeskHop resembles traditional KVM switches used for decades allowing personnel toggle mouse/keyboard connections feeding multiple systems.
However, DeskHop radically reinvents input switching through innovative software and hardware choices providing key advantages over antiquated KVM approaches.
Pure Hardware-Based Switching
Unlike most software-based input managers, DeskHop utilizes physical electronic signals forcing true real-time device handoffs without lag interfering.
This means no delays, cursor hesitation or button presses missing targets transitioning between computers. The pure hardware-based methodology makes switching reliably crisp.
Agnostic Device Support
Classic KVM solutions also depend on restrictive EDID protocols limiting wider compatibility across operating systems and machine types.
Because DeskHop functions independently of any software or EDID handshake requirements, it readily pairs with PCs, Macs, Linux devices, streaming boxes and most electronics supporting USB input connections.
Custom Control & Performance
Building your own DeskHop empowers modifying behaviours exactly the way you prefer too.
Want ultra-responsive switches triggered slightly moving the mouse? Or rapid toggling through multiple devices serially? No problem – customize sensitivity to your taste!
It also facilitates enhancing later as faster components become available by simply swapping parts. Or even integrating secondary buttons and controls expanding functionality down the road.
How To Build Your Own DeskHop
Ready to declutter your workspace with a high-performance DeskHop? Gather these components first:
- 2 x Raspberry Pi Pico microcontrollers
- Breadboard
- Micro USB cables
- Tactile buttons, resistors, jumper wires
- Soldering iron
With parts in hand, follow these steps constructing your custom input switch:
Step 1 – Setup Raspberry Pi Pico
Flash the latest Raspberry Pi RP2040 firmware on both Pico units using the Raspberry Pi documentation.
This prepares the microcontrollers managing DeskHop’s core input state detection and connectivity toggling functions.
Step 2 – Connect Trigger Components
Solder buttons, resistors and wires onto a breadboard producing two trigger circuits – one managing mouse left/right edge movements, and another toggling manually.
These hooks allow controlling when your DeskHop cycles connected devices through software and hardware events.
Step 3 – Write DeskHop Code
Now comes the magic making everything work! Flash the open-source DeskHop firmware comprising just around 100 lines of simple CircuitPython code.
This empowers each Pico detecting your trigger conditions and orchestrating USB switchovers accordingly.
Step 4 – Configure Devices
Finally, connect computers and peripherals through the Pi Picos using USB-C and USB-A ports.
Then install necessary keyboard/mouse drivers on paired machines allowing DeskHop reroute control seamlessly between them.
That’s it! Now toggle devices as needed using on-screen mouse movements or button presses!
Enhance Your DeskHop Further
Basic DeskHop builds work excellently for most users. But customization possibilities abound for power users wanting expanded configurations.
More Devices
Support more connected machines by chaining additional Raspberry Pi Picos via USB.
Flashing alternate multi-hop firmware builds out selectivity across greater gadgets.
Shortcuts & Modes
Program secondary buttons introducing shortcut triggers or preset switching modes.
For example, bind a button swapping between work and personal device profiles automatically.
Status Indicators
Solder LEDs indicating currently active machines or other custom behaviors.
This visual feedback helps orient which computer receives input without checking OSD labels directly.
Declutter Your Desk With DeskHop
Cable congestion congests workflows. DeskHop delivers the ultimate solution consolidated keyboard, mouse and other peripherals across growing device ecosystems.
By constructing your own USB switch powered by Raspberry Pi Pico microcontrollers, enjoy ultimate flexibility and control for your needs.
Ditch cable chaos strangling productivity and embrace seamless input switching with DeskHop instead!
Have you built any custom keyboard/mouse sharing gadgets? What features help maximize your desktop experience? Let us know in the comments!


Add Comment