Resetting your device’s parental control settings by deleting Qustodio can be necessary for several reasons, whether you’re upgrading to a different software or simply no longer need the service. Qustodio is a widely-used parental control software that helps monitor, manage, and protect children’s device use across different platforms. This guide will provide step-by-step instructions on how to uninstall or delete Qustodio from your devices.
What is Qustodio and Why Delete It?
Qustodio provides a range of monitoring tools that allow parents to see how their children use devices, set limits, and block inappropriate content. However, you might consider deleting it if you find the software no longer meets your family’s needs, your children have outgrown it, or you prefer to use different parental control settings.
Steps to Delete Qustodio from Your Devices
On Windows:
- Open the Control Panel: Click on the Start menu, type “Control Panel,” and press Enter.
- Go to Programs: Select “Programs” or “Programs and Features” depending on your view settings.
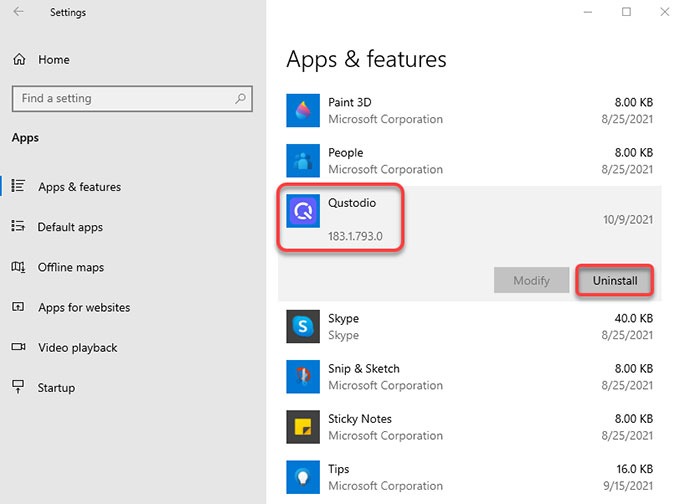
- Uninstall a Program: Find Qustodio in the list of installed programs, click on it, and then click the “Uninstall” button.
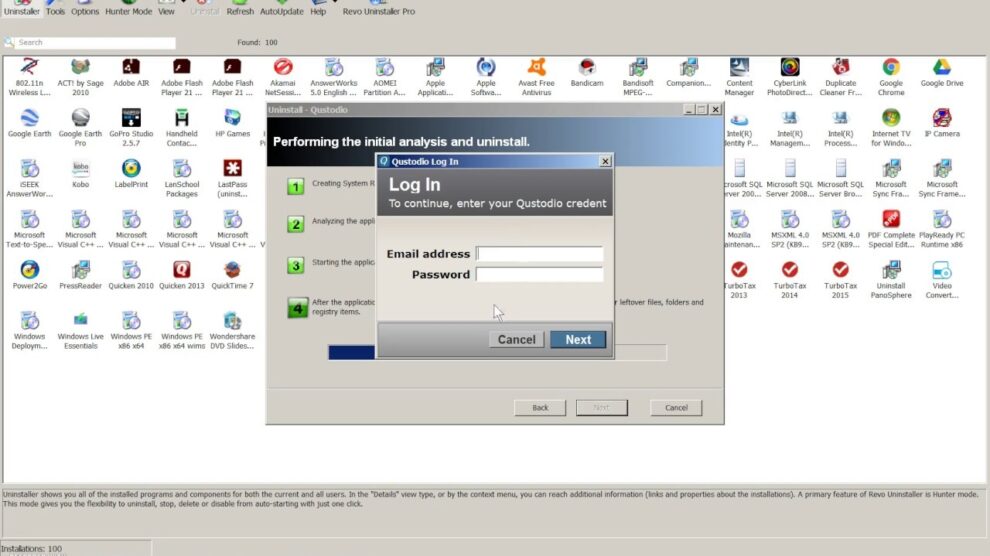
- Follow the Uninstallation Wizard: Follow the prompts in the uninstallation wizard to complete the removal of Qustodio from your computer.
On macOS:
- Open Finder: Go to the Finder to begin the uninstallation process.
- Go to Applications: Navigate to the Applications folder in Finder.
- Remove Qustodio: Locate the Qustodio app, drag it to the Trash, or right-click and select “Move to Trash.”
- Empty the Trash: Right-click on the Trash icon in your dock and select “Empty Trash” to permanently remove the application.
On Android:
- Open Settings: Go to the Settings app on your device.
- Navigate to Apps or Applications: The exact name may vary depending on your device.
- Select Qustodio: Find Qustodio in the list of installed apps and select it.
- Uninstall Qustodio: Tap on “Uninstall” and confirm that you want to remove the app.
On iOS (iPhone/iPad):
- Find the Qustodio App: Locate the Qustodio app icon on your home screen.
- Delete the App: Tap and hold the app icon until it jiggles, then tap the “X” that appears on the icon.
- Confirm Deletion: When prompted, confirm that you want to delete the app by tapping “Delete.”

Additional Steps to Consider
- Remove Device Administrators (Android): Before uninstalling Qustodio on Android, you may need to deactivate it as a device administrator. Go to Settings > Security > Device administrators, deselect Qustodio, and confirm.
- Cancel Your Subscription: If you have a paid subscription to Qustodio, remember to cancel it through your account settings on the Qustodio website to avoid further charges.
- Contact Support: If you encounter any issues during the uninstallation process or need further assistance, consider contacting Qustodio support for help.
FAQs About Deleting Qustodio
What happens to the data collected by Qustodio after I delete the app?
After you delete Qustodio, the data collected by the app is generally retained in your online account for a period unless you specifically request its deletion or delete your account entirely.
Can I reinstall Qustodio later?
Yes, you can always reinstall Qustodio on any device by downloading the app from its respective app store and logging in with your credentials.
How do I delete my Qustodio account entirely?
To delete your Qustodio account entirely, you will need to log in to your account on the Qustodio website, navigate to the account settings, and follow the instructions for account deletion.
Conclusion
Deleting Qustodio from your devices can help you manage your family’s digital environment according to your current needs. By following these steps, you can ensure that the software is completely removed from your devices, allowing you to set up alternative solutions if necessary. Remember to handle the process carefully to ensure that all components of the software are thoroughly removed.


Add Comment