In the dynamic world of software development, managing your Bitbucket repositories is crucial for maintaining an organized and efficient workflow. If you find yourself needing to delete a repository, this comprehensive guide will walk you through the process step-by-step, ensuring a seamless and secure experience.
Understanding the Importance of Deleting Bitbucket Repositories
Deleting a repository on Bitbucket can provide several benefits that can enhance your overall project management and collaboration:
- Decluttering Your Workspace: Removing unused or outdated repositories helps you maintain a clean and organized Bitbucket workspace, making it easier to locate and manage your active projects.
- Enhanced Security: By eliminating repositories that are no longer in use, you reduce the risk of unauthorized access or potential security breaches, safeguarding your valuable project data.
- Improved Collaboration: Deleting redundant or irrelevant repositories can help your team members focus on the most essential projects, fostering better communication and collaboration.
- Compliance and Legal Considerations: In some cases, deleting repositories may be necessary to comply with regulatory requirements or legal obligations, ensuring your Bitbucket account remains compliant.
How to Delete a Repository on Bitbucket: A Step-by-Step Guide
Deleting a repository on Bitbucket is a straightforward process. Follow these simple steps to remove a repository from your Bitbucket account:
- Log in to your Bitbucket account: Access your Bitbucket dashboard using your credentials.
- Navigate to the Repository: Locate the repository you wish to delete in your Bitbucket workspace.
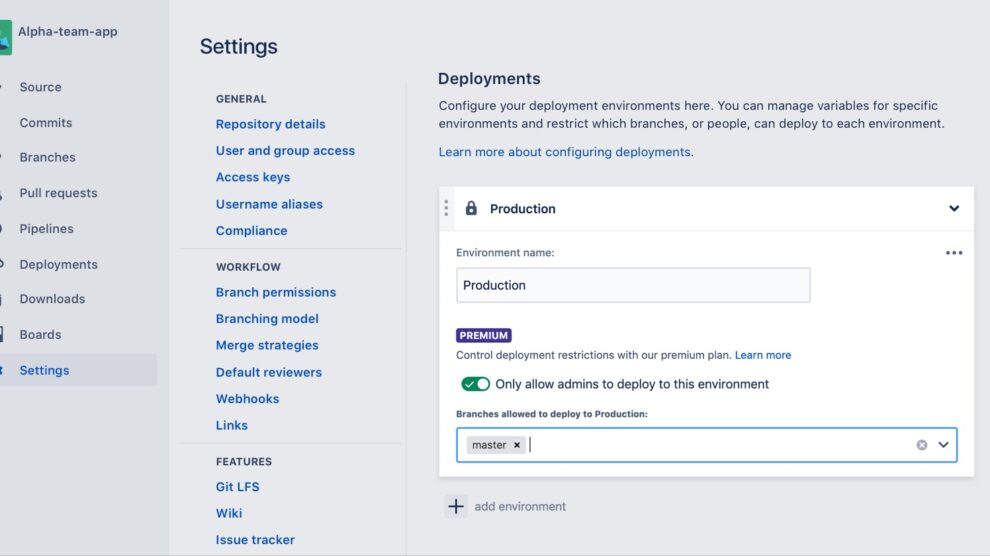
- Access the Repository Settings: Look for the “Settings” option, often located in the repository’s menu or sidebar.
- Initiate the Deletion Process: Within the repository settings, you should find an option to delete the repository. This may be labeled as “Delete repository” or a similar variation.
- Confirm the Deletion: Bitbucket will prompt you to confirm your decision to delete the repository. Carefully review the information and proceed with the deletion if you’re certain.
- Verify the Deletion: After the deletion process is complete, double-check to ensure that the repository has been successfully removed from your Bitbucket account.

Addressing Common Concerns: Navigating the Repository Deletion Process
During the repository deletion process, you may encounter some common concerns or questions. Let’s address a few of them:
- Ongoing Work or Branches: If the repository you’re deleting has active branches or ongoing work, you’ll need to ensure that all relevant data is backed up or transferred to another location before proceeding with the deletion.
- Repository Collaboration: If the repository you’re deleting is shared with other team members, you’ll need to communicate the deletion and ensure that everyone is aware of the changes.
- Retrieval of Deleted Repository: Bitbucket may offer a limited timeframe during which you can retrieve a deleted repository. Consult the platform’s documentation or support team for more information.
- Deleting Private Repositories: Special considerations may apply when deleting private repositories, as they may contain sensitive information. Ensure that you follow the appropriate security protocols during the deletion process.
Maintaining a Clean and Organized Bitbucket Workspace
After deleting a repository, consider these additional tips to keep your Bitbucket workspace streamlined and efficient:
- Regularly Review Your Repositories: Schedule periodic reviews of your Bitbucket repositories to identify any that are no longer needed or relevant, and promptly delete them.
- Implement Repository Naming Conventions: Use clear and descriptive naming conventions for your Bitbucket repositories, making it easier to identify and manage them in the future.
- Leverage Bitbucket’s Organization Features: Explore Bitbucket’s organizational tools, such as workspaces and teams, to maintain a well-structured and collaborative environment.
- Stay Informed on Bitbucket Updates: Keep an eye out for any changes or improvements to Bitbucket’s repository management features, as they may streamline the deletion process or introduce new options.
Empowering Your Bitbucket Workflow: Deleting Repositories with Confidence
By following this comprehensive guide, you’ve gained the knowledge and confidence to effectively delete repositories on Bitbucket. Remember, maintaining a clean and organized Bitbucket workspace is crucial for project management, collaboration, and compliance, ultimately contributing to the success of your software development endeavors.
Embrace this newfound ability to manage your Bitbucket repositories and continue optimizing your digital workspace, ensuring a seamless and productive development experience.


Add Comment